
Huh?!? I can't hear you!
- f100build
- Mar 11, 2016
- 3 min read
Welcome back! I want to thank you for checking in on the progress of the build. I enjoy sharing the trials, tribulations, successes and failures with you. I would really like to hear from you. Tell me your classic car story; maybe I’ll feature it here on the blog. Keep checking back!! And send in those stories!! All you have to do is go to the “more” tab at the top of the page. Click the contact link, which will take you to a page where you can fill in the requested information and send me your story! I look forward to reading them!
When I look back at the past two weeks while preparing to write this I have a chance to reflect on what I have learned, and how much progress was made. The time we spent on the truck the first week didn’t show show much progress. We did take some steps in the right direction, however. The second week there were some major leaps in the right direction.
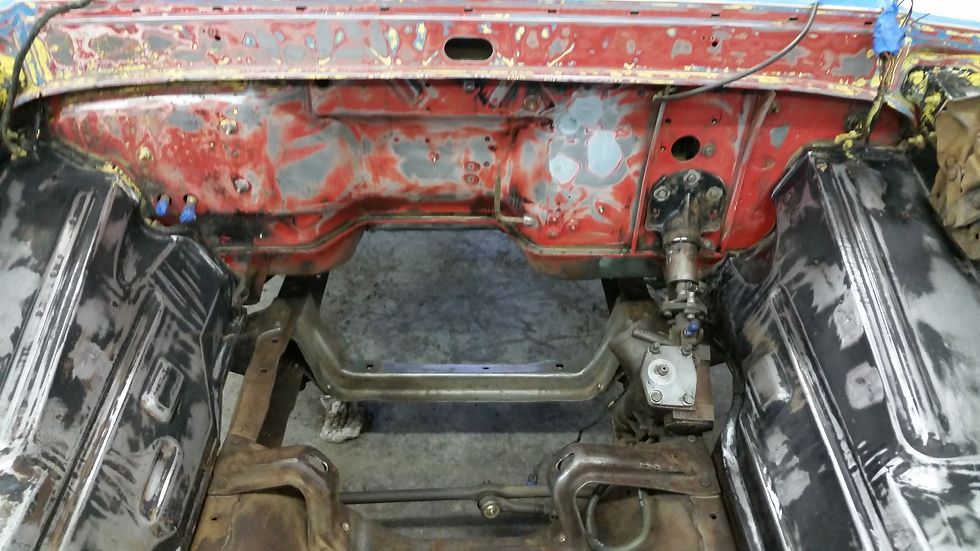
There was a lot of time spent under the truck the first week. We continued to clean the undercarriage of the truck, to get it ready to be painted. While I was working under the truck, and in the engine bay, Rich was working in the cab. The truck had a four speed manual transmission in it when I bought it. When we removed the transmission there was a large hole in the floor-board sheet metal. The best picture of the torn up floor isn’t the best representation of the size of the hole (it was roughly 12’’ wide by 18’’ long). Rich was in the cab fabricating a piece of sheet metal for the hole.

When I was finished cleaning up the bottom side of the truck, I moved onto the underside of the bed of the truck. There wasn’t very much attention needed to be paid to the bed. I just needed to wire brush the entire underside of the bed. After the bed was brushed off, Rich and I discussed the placement of the fuel tank filler neck. We are going to move the fuel tank from the cab to the back of the truck. This requires some forethought. The door to the filler neck was donated from the 1989 F250 Rich has, the same truck I got my seat from.

This conversation was lengthy; I (obviously) have never done anything like this, so my imagination was working in overdrive. Trying to imagine how the bends in the filler hose had to be to make it to the fuel tank. Not only do the bends in the hose have to be correct, we also have to ensure that there is enough room under the bed for the tank. The door to the filler hose is going in the rear drivers’ side quarter panel. We think we have a decent plan laid out.


The second week more visual progress was made. Rich and I made some real progress in the engine bay. I started filling the smaller holes, that weren’t necessary, by welding. Rich found a handy tool made of copper that you stick behind the hole you are filling, and it creates a sturdy underside for the molten metal to pool and bond to the body steel, instead of the copper spoon. It’s called a Welders Curved Copper Spoon. I wasn’t very proficient with the copper spoon; it took some practice to catch on.
Once I had welded the holes closed, the fun part – grinding the nasty cooled weld. I say nasty because I am not good at welding. The filled holes looked like the Rocky Mountains on a map. There were peaks and valleys all over my welds. Grinding off the excess material was time consuming, and it gave me one hell-of-a head ache.
I didn’t have the good sense to put on hearing protection before getting started grinding. My ears were ringing for hours after that. I think the grinding on thin sheet metal, in a confined space that was amplifying the sound was a bad combination.

After all of the welds were grinded down flush with the surrounding sheet metal, the air sander was needed. The air sander is used to rough up the surface in preparation for primer and paint. Check back to see what progress we make in the next few weeks!!
Until then -
Comments